5 Diabetic Lunch Recipes That Keep You Full Until Dinner
I’ll never forget the afternoon my aunt called me, frustrated and hungry. “I nailed breakfast,” she said, “but by 3 p.m., I’m starving, my energy crashes, and I reach for whatever’s easiest—usually something I regret.” She’s been managing type 2 diabetes for years, and like so many, she had mastered breakfast but felt lost when it came to lunch.

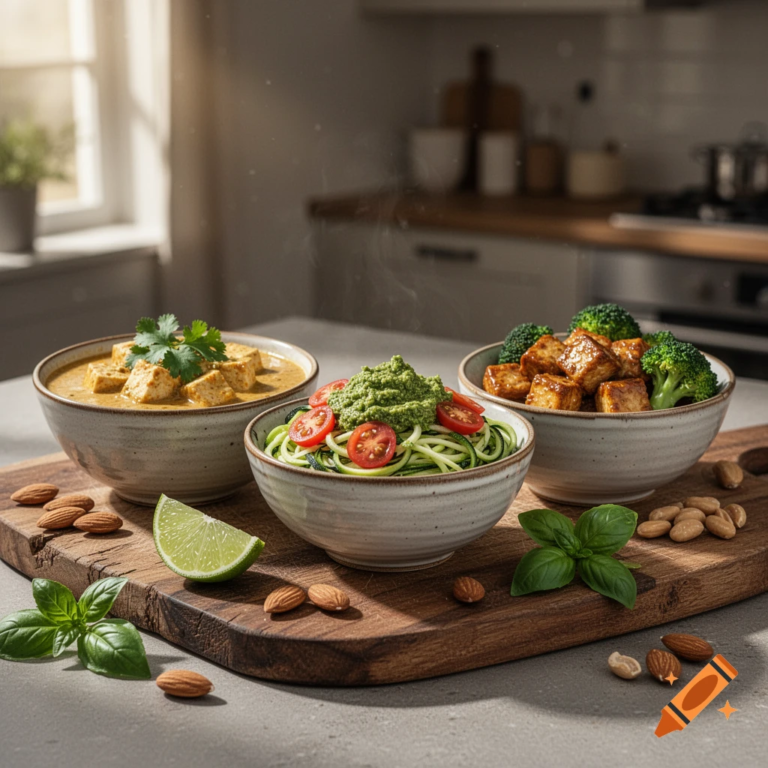
That conversation sparked a mission: create lunches that are not only blood-sugar friendly but actually keep you satisfied until dinner. No more 3 p.m. slumps, no more boring salads, no more guessing games. Whether you’re newly diagnosed, years into your journey, or simply supporting someone who is, these 5 diabetic lunch recipes are designed to fuel your afternoon with steady energy, delicious flavours, and the kind of fullness that lasts. Let’s transform your lunch break into something you’ll genuinely look forward to.
Table of Contents
For more balanced lunch ideas and low glycemic recipes, check out our 20 Low Glycemic Index Recipes collection.
RECETTE 1: Veggie Protein Loaf with Arugula Pear Walnut Salad
✨ Free Ebook: 5 Healthy Snack Recipes ✨

💌 Get more recipes by email! Subscribe to our newsletter for weekly diabetes-friendly recipes and tips. Subscribe →
H3: Veggie Protein Loaf – Hearty, Satisfying & Blood-Sugar Friendly
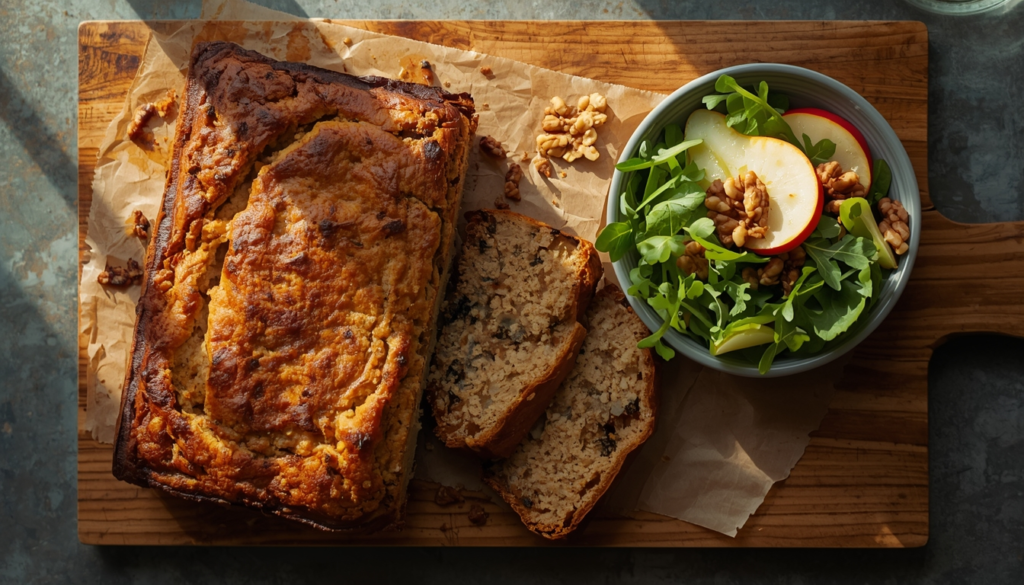
This protein-packed loaf is a revelation for anyone who thinks diabetic lunches have to be boring. Imagine a slice of something that feels like comfort food—warm, herbaceous, and satisfying—but is actually loaded with vegetables and lean protein. It’s perfect served warm with a side of fresh salad, and it’s even better the next day.
Why this recipe works for diabetics:
- 20,8g of protein per serving keeps you full for hours, preventing those mid-afternoon cravings we talked about.
- Only 8,65g net carbs, thanks to the almond flour and plenty of veggies.
- 4,8g of fibre from vegetables and flaxseed meal helps slow down glucose absorption.
Key Ingredients
- 1 tablespoon olive oil
- 1 medium onion, finely chopped
- 2 garlic cloves, minced
- 1 cup mushrooms, finely chopped
- 1 cup zucchini, grated and squeezed of excess water
- 1 cup carrots, grated
- 1 cup cooked lentils (or 1 can, rinsed and drained)
- 3 large eggs, lightly beaten
- 1 cup almond flour
- ¼ cup ground flaxseed meal
- 1 teaspoon dried thyme
- 1 teaspoon dried oregano
- ½ teaspoon salt
- ¼ teaspoon black pepper
For the Arugula Pear Walnut Salad
- 4 cups fresh arugula
- 1 ripe pear, thinly sliced
- ¼ cup walnuts, toasted
- 2 tablespoons lemon juice
- 2 tablespoons olive oil
- Salt and pepper to taste
Method
- Preheat your oven to 375°F (190°C). Line a 9×5-inch loaf pan with parchment paper.
- In a large skillet, heat olive oil over medium heat. Add onion and sauté until translucent, about 5 minutes.
- Add garlic and mushrooms, cook for another 3-4 minutes until mushrooms release their liquid and start to brown.
- Add grated zucchini and carrots, cook for 2 minutes, stirring frequently. Remove from heat and let cool slightly.
- In a large bowl, combine cooked vegetables, lentils, beaten eggs, almond flour, flaxseed meal, thyme, oregano, salt, and pepper. Mix until well combined.
- Transfer the mixture to the prepared loaf pan and press down firmly and evenly.
- Bake for 45-50 minutes until the top is golden brown, and a toothpick inserted in the centre comes out clean.
- Let the loaf cool in the pan for 10 minutes, then lift it out using parchment paper and transfer to a wire rack.
- While the loaf cools, prepare the salad: In a small bowl, whisk lemon juice, olive oil, salt, and pepper. In a large bowl, toss arugula, pear slices, and walnuts with the dressing.
- Slice the protein loaf and serve warm with a generous portion of salad on the side.
Pro tip: This loaf is perfect for meal prep. Make it on Sunday, slice it, and store individual portions in the fridge. Grab a slice with a handful of greens for the easiest work lunch ever. It also freezes beautifully for up to 3 months!
Nutrition (per serving, 1 slice + salad)
- Calories: 297
- Protein: 20,8g
- Net Carbs: 8,65g
- Fibre: 4,8g
- Fat: 18g
RECETTE 2: Lettuce Wraps with Spicy Chicken & Poivrons
H3: Lettuce Wraps – Fresh, Crunchy & Surprisingly Satisfying
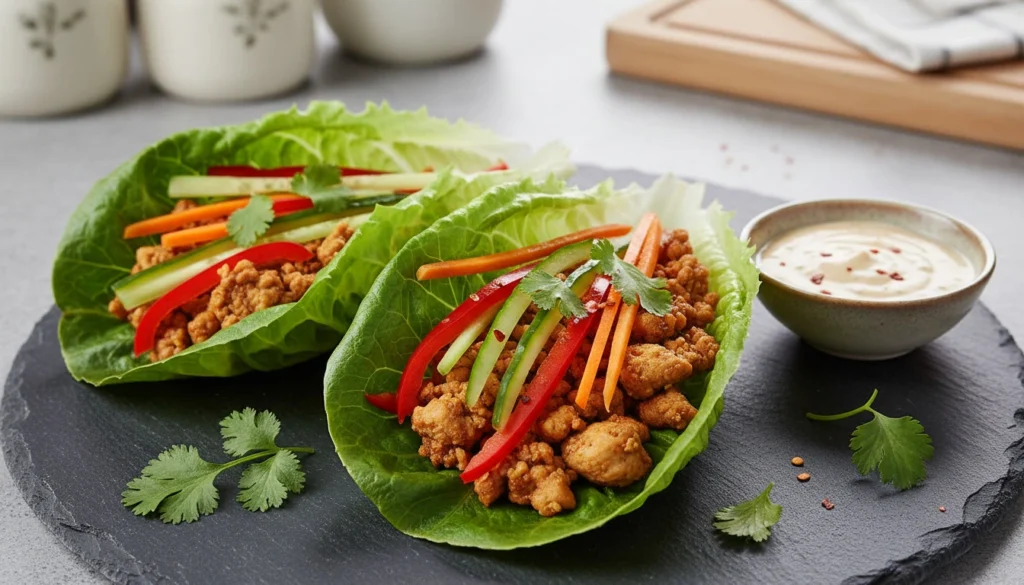
These lettuce wraps are proof that low-carb eating doesn’t mean sacrificing flavour or fun. Imagine biting into a cool, crisp lettuce leaf filled with warm, spicy chicken, crunchy vegetables, and a drizzle of creamy sauce. It’s interactive, it’s fresh, and it’s perfect for busy afternoons when you need something satisfying without feeling heavy.
Why this recipe works for diabetics:
- 25g of protein per serving from lean chicken keeps your blood sugar stable and cravings away.
- Only 10g net carbs, thanks to using lettuce instead of tortillas or bread.
- Rich in fibre and vitamins from the colourful vegetables, which helps slow glucose absorption.
- No cooking required for the assembly – perfect for hot summer days or when you want something light.
Key Ingredients
For the Spicy Chicken Filling:
- 1 lb ground chicken breast (or turkey)
- 1 tablespoon sesame oil
- 3 cloves garlic, minced
- 1 tablespoon fresh ginger, grated
- ½ cup water chestnuts, finely chopped
- ¼ cup green onions, sliced
- 2 tablespoons tamari or coconut aminos
- 1 tablespoon rice vinegar
- 1 teaspoon chilli garlic sauce (adjust to taste)
- 1 teaspoon honey or monk fruit sweetener (optional)
For the Vegetables:
- 1 red bell pepper, julienned
- 1 carrot, julienned
- 1 cucumber, julienned
- Fresh cilantro leaves
For the Wraps:
- 12 large butter lettuce leaves or romaine hearts, washed and dried
For the Creamy Dipping Sauce:
- ¼ cup plain Greek yoghurt (or dairy-free alternative)
- 1 tablespoon lime juice
- 1 teaspoon sriracha (optional)
- Pinch of salt
Method
- Prepare the sauce: In a small bowl, whisk together Greek yoghurt, lime juice, sriracha, and salt. Refrigerate until ready to serve.
- Cook the chicken: Heat sesame oil in a large skillet or wok over medium-high heat. Add garlic and ginger, sauté for 30 seconds until fragrant.
- Add ground chicken and cook, breaking it up with a spoon, until browned and cooked through, about 6-8 minutes.
- Stir in water chestnuts, green onions, tamari, rice vinegar, chilli garlic sauce, and sweetener (if using). Cook for another 2 minutes until heated through and well combined.
- Prepare the vegetables: While the chicken cooks, julienne the bell pepper, carrot, and cucumber. Set aside.
- Assemble the wraps: Lay out lettuce leaves on a platter. Spoon about ¼ cup of the chicken mixture into each leaf.
- Top with julienned vegetables and fresh cilantro.
- Drizzle with the creamy sauce or serve it on the side for dipping.
- Serve immediately and enjoy the crunch!
Pro tip: This recipe is perfect for meal prep. Cook the chicken filling ahead of time and store it in the refrigerator for up to 4 days. Prep the vegetables and wash the lettuce leaves, storing them separately. When lunchtime comes, simply reheat the chicken, assemble, and enjoy in minutes. You can also serve the filling cold for a refreshing twist on hot summer days.
Variation: For a plant-based version, substitute ground chicken with crumbled tempeh or tofu and follow the same cooking instructions.
Nutrition (per serving, 2 wraps)
- Calories: 280
- Protein: 25g
- Net Carbs: 10g
- Fibre: 3g
- Fat: 14g
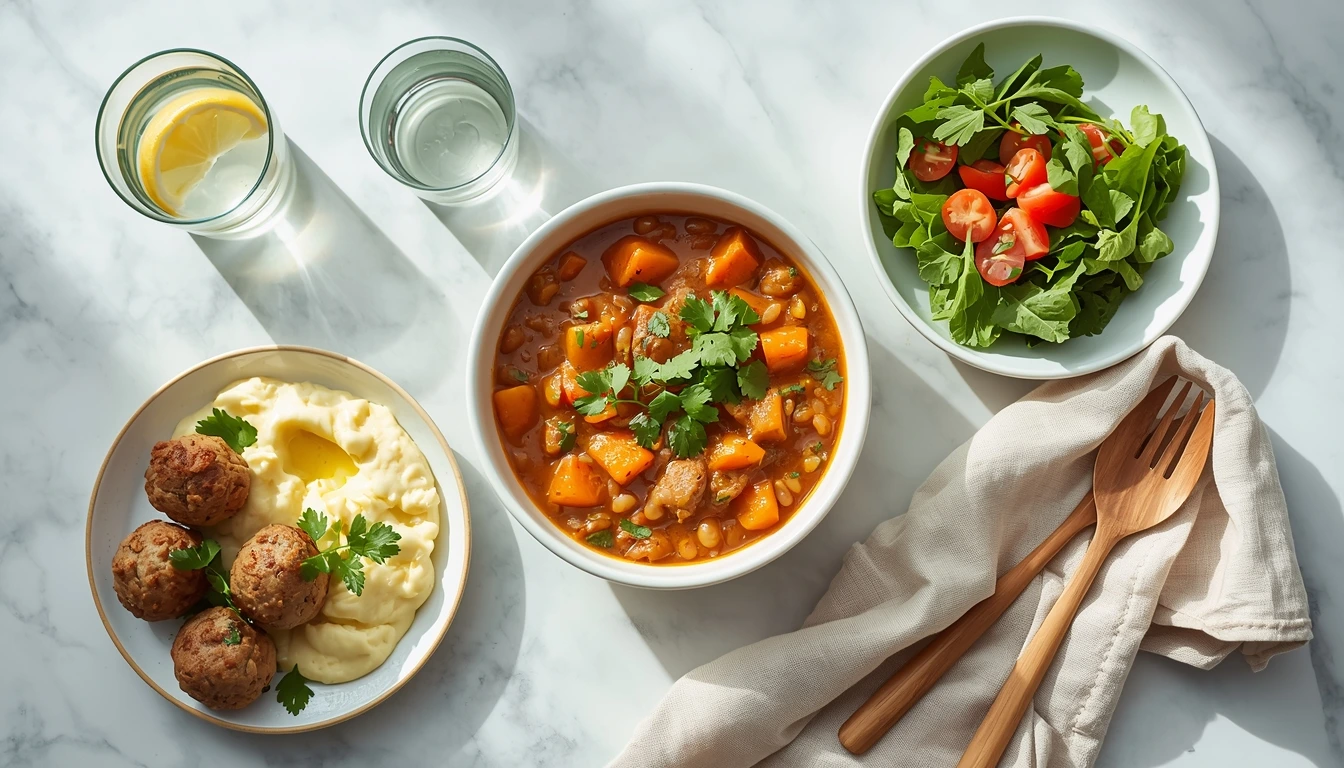
RECETTE 3: Sweet Potato Lentil Stew – Comfort in a Bowl
H3: Sweet Potato Lentil Stew – Warm, Hearty & Surprisingly Light
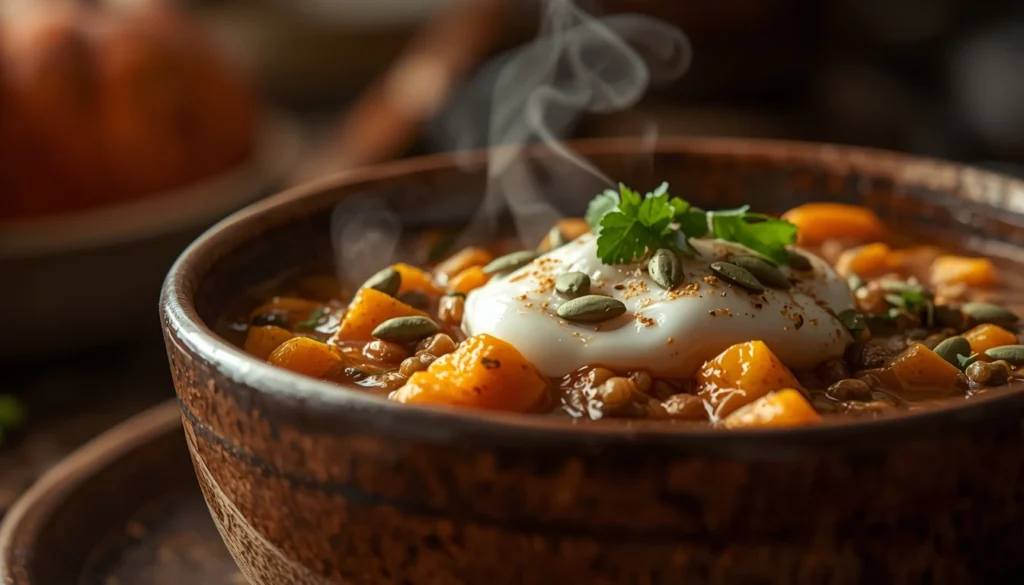
There’s something magical about a bowl of warm soup on a chilly afternoon. This Sweet Potato Lentil Stew is exactly that kind of comfort food—the kind that wraps around you like a cosy blanket. But don’t let the word “comfort” fool you; this stew is packed with fibre and plant-based protein, making it one of the most satisfying diabetic-friendly lunches you’ll ever try. It’s the perfect example of how healthy eating can feel like a hug in a bowl.
Why this recipe works for diabetics:
- Rich in fibre (8g per serving) from lentils and sweet potatoes, it slows down digestion and prevents blood sugar spikes.
- Plant-based protein (15g per serving) keeps you full for hours without the heaviness of meat.
- Low glycemic index ingredients like lentils and sweet potatoes (in moderation) provide steady energy.
- Perfect for meal prep – this stew tastes even better the next day and freezes like a dream.
Key Ingredients
- 1 tablespoon coconut oil or olive oil
- 1 large onion, diced
- 3 cloves garlic, minced
- 1 tablespoon fresh ginger, grated
- 1 teaspoon ground cumin
- 1 teaspoon ground coriander
- ½ teaspoon turmeric
- ¼ teaspoon cinnamon
- Pinch of cayenne pepper (optional)
- 1 medium sweet potato, peeled and cubed (about 2 cups)
- 1 cup dried red lentils, rinsed
- 4 cups vegetable broth (low sodium)
- 1 can (14 oz) diced tomatoes
- 1 bay leaf
- 2 cups fresh spinach or kale
- 2 tablespoons lime juice
- Salt and pepper to taste
- Fresh cilantro for garnish
Method
- Sauté the aromatics: In a large pot or Dutch oven, heat coconut oil over medium heat. Add onion and sauté until soft and translucent, about 5 minutes.
- Add garlic, ginger, cumin, coriander, turmeric, cinnamon, and cayenne. Stir constantly for 1 minute until fragrant—this step awakens the spices and builds the flavour foundation.
- Add the main ingredients: Stir in sweet potato cubes, rinsed red lentils, vegetable broth, diced tomatoes (with their juices), and bay leaf. Bring to a boil.
- Simmer: Reduce heat to low, cover, and let simmer for 20-25 minutes, or until sweet potatoes are tender and lentils have broken down, creating a naturally thick and creamy texture.
- Add greens: Stir in fresh spinach or kale and cook for 2-3 minutes until wilted.
- Finish with lime: Remove from heat, discard bay leaf, and stir in lime juice. Season with salt and pepper to taste.
- Serve: Ladle into bowls and garnish generously with fresh cilantro. For extra creaminess, add a dollop of plain Greek yoghurt or a drizzle of coconut milk.
Pro tip: This stew is the ultimate meal prep hero. Make a big batch on Sunday and portion it into individual containers for the week. It thickens as it sits, so you might want to add a splash of broth or water when reheating. It also freezes beautifully for up to 3 months—perfect for those days when you need a healthy lunch but don’t have time to cook.
Variation: For extra protein, top each serving with grilled chicken, crispy tofu cubes, or a spoonful of Greek yoghurt. You can also swap sweet potato for butternut squash or pumpkin for a different flavour profile.
Nutrition (per serving, about 1½ cups)
- Calories: 320
- Protein: 15g
- Net Carbs: 23,3g
- Fiber: 8g
- Fat: 7g
Récapitulatif des 3 premières recettes
| Recette | Type | Protéines | Glucides nets | Fibres | Temps |
|---|---|---|---|---|---|
| Veggie Protein Loaf | Plat chaud | 20,8g | 8,65g | 4,8g | 45 min |
| Lettuce Wraps | Wrap frais | 25g | 10g | 3g | 20 min |
| Sweet Potato Lentil Stew | Soupe | 15g | 23,3g | 8g | 40 min |
RECETTE 4: Low-Carb Garlic Butter Chicken Meatballs with Cauliflower Mash
H3: Low-Carb Garlic Butter Chicken Meatballs – Comfort Food Reinvented
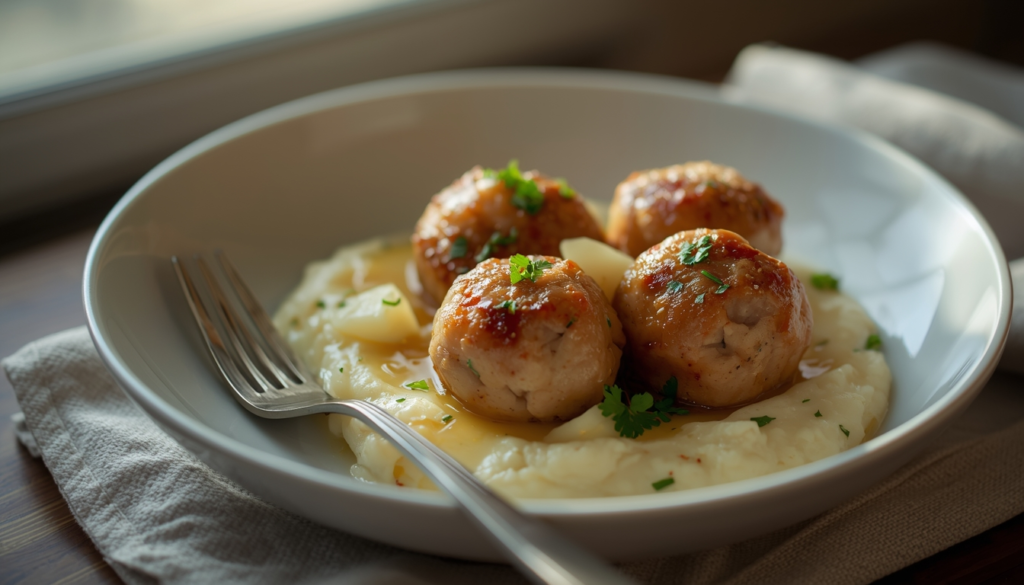
Some meals just feel like a warm hug on a plate. These chicken meatballs are exactly that—juicy, tender, and swimming in a rich garlic butter sauce that’s absolutely irresistible. Served over creamy cauliflower mash, this dish proves that low-carb eating doesn’t mean giving up the comfort foods you love. It’s the kind of meal that makes you forget you’re eating healthy.
Why this recipe works for diabetics:
- 27g of protein per serving from lean chicken keeps you full for hours and stabilises blood sugar.
- Only 7g net carbs, thanks to using almond flour instead of breadcrumbs and cauliflower instead of potatoes.
- Healthy fats from olive oil and butter provide sustained energy and enhance flavour without spiking glucose.
- Rich in fibre from the cauliflower mash (3g per serving) aids digestion and slows carb absorption.
Key Ingredients
For the Chicken Meatballs:
- 1 lb ground chicken (or turkey)
- ½ cup almond flour
- ¼ cup grated Parmesan cheese (optional, omit for dairy-free)
- 1 large egg, lightly beaten
- 2 cloves garlic, minced
- 1 tablespoon fresh parsley, chopped
- ½ teaspoon salt
- ¼ teaspoon black pepper
- ¼ teaspoon red pepper flakes (optional)
- 2 tablespoons olive oil, for frying
For the Garlic Butter Sauce:
- 3 tablespoons unsalted butter (or vegan butter)
- 4 cloves garlic, thinly sliced
- ¼ cup chicken broth (low sodium)
- 1 tablespoon lemon juice
- 2 tablespoons fresh parsley, chopped for garnish
For the Cauliflower Mash:
- 1 large head of cauliflower, cut into florets
- 2 tablespoons cream cheese or Greek yoghurt (optional for creaminess)
- 1 tablespoon butter or olive oil
- Salt and pepper to taste
Method
- Make the cauliflower mash: Bring a large pot of salted water to a boil. Add cauliflower florets and cook for 10-12 minutes until very tender. Drain well and return to the pot. Add cream cheese (if using), butter, salt, and pepper. Mash with a potato masher or blend with an immersion blender until smooth and creamy. Set aside and keep warm.
- Prepare the meatballs: In a large bowl, combine ground chicken, almond flour, Parmesan (if using), egg, minced garlic, parsley, salt, pepper, and red pepper flakes. Mix gently with your hands until just combined—don’t overmix, or the meatballs will be tough.
- Form the meatballs: Roll the mixture into 1½-inch balls (about 16-18 meatballs).
- Cook the meatballs: Heat olive oil in a large skillet over medium-high heat. Add meatballs in a single layer (work in batches if needed) and cook for 8-10 minutes, turning occasionally, until golden brown on all sides and cooked through (internal temperature should reach 165°F). Remove meatballs from the skillet and set aside.
- Make the garlic butter sauce: In the same skillet, reduce the heat to medium. Add butter and let it melt. Add sliced garlic and cook for 1-2 minutes until fragrant and lightly golden, being careful not to burn it. Pour in chicken broth and lemon juice, scraping up any browned bits from the bottom of the pan. Let simmer for 2-3 minutes until slightly reduced.
- Combine and serve: Return meatballs to the skillet and toss gently to coat in the sauce. Simmer for 1-2 minutes to heat through. Serve meatballs and sauce over a generous portion of cauliflower mash. Garnish with fresh parsley.
Pro tip: These meatballs are perfect for meal prep. Make a double batch and freeze half for later. They reheat beautifully in the microwave or in a skillet with a splash of broth. The cauliflower mash can also be made ahead and reheated—just add a little water or milk when warming to restore creaminess.
Variation: For a dairy-free version, omit the Parmesan and use vegan butter in the sauce. You can also substitute ground chicken with ground turkey or lean ground beef. For extra veggies, serve with a side of roasted broccoli or a simple green salad.
Nutrition (per serving, 4-5 meatballs + ¾ cup mash)
- Calories: 320
- Protein: 27g
- Net Carbs: 7g
- Fibre: 3g
- Fat: 20g

Récapitulatif des 4 recettes
| Recette | Type | Protéines | Glucides nets | Fibres |
|---|---|---|---|---|
| Veggie Protein Loaf | Plat chaud | 20,8g | 8,65g | 4,8g |
| Lettuce Wraps | Wrap frais | 25g | 10g | 3g |
| Sweet Potato Lentil Stew | Soupe | 15g | 23,3g | 8g |
| Garlic Butter Chicken Meatballs | Plat chaud | 27g | 7g | 3g |
RECETTE 5: Roasted Veggie & Tilapia Grain Bowl
H3: Roasted Veggie & Tilapia Grain Bowl – Colorful, Fresh & Incredibly Satisfying
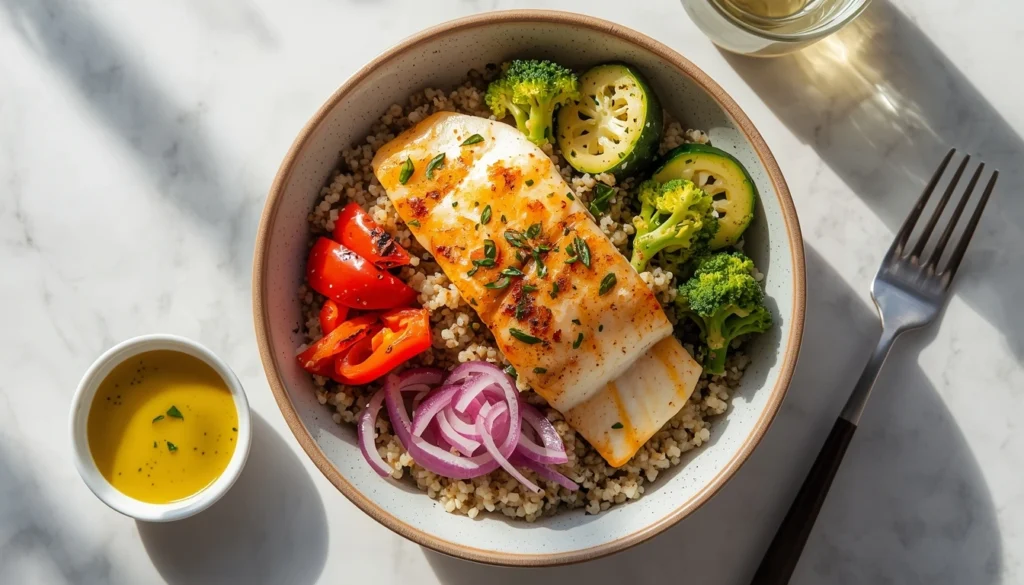
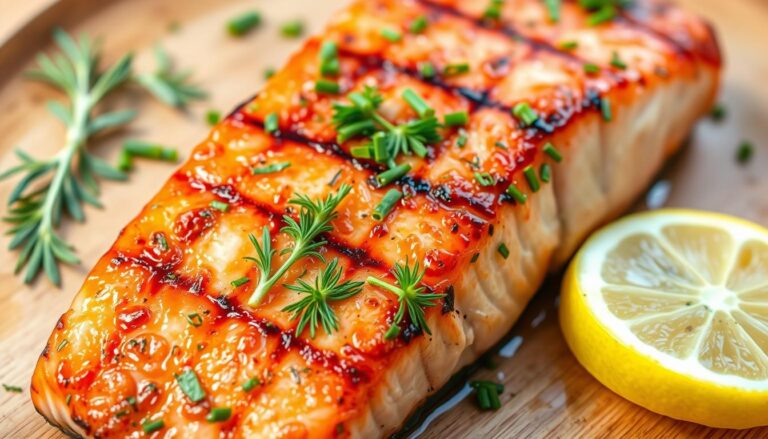
There’s something beautiful about a bowl filled with vibrant colours and textures. This Tilapia Grain Bowl is exactly that—a celebration of fresh ingredients that come together to create a meal that’s as pleasing to the eye as it is to the palate. Flaky white fish, tender roasted vegetables, fluffy quinoa, and a bright lemon-herb dressing—all nestled in one bowl. It’s the kind of lunch that makes you feel nourished from the inside out.
Why this recipe works for diabetics:
- 33g of protein per serving from tilapia and quinoa keeps blood sugar stable and hunger at bay.
- Low-glycemic carbohydrates from quinoa (in moderation) and vegetables provide steady energy without spikes.
- Rich in fibre (5g) from vegetables and quinoa, it aids digestion and promotes fullness.
- Healthy omega-3 fatty acids from tilapia support heart health—especially important for diabetics.
- Perfect for meal prep – assemble bowls ahead of time and add dressing just before serving.
Key Ingredients
For the Roasted Vegetables:
- 1 medium zucchini, sliced into half-moons
- 1 red bell pepper, cut into chunks
- 1 cup broccoli florets
- 1 red onion, cut into wedges
- 2 tablespoons olive oil
- 1 teaspoon dried oregano
- ½ teaspoon salt
- ¼ teaspoon black pepper
For the Tilapia:
- 4 tilapia fillets (about 4-5 oz each)
- 1 tablespoon olive oil
- 1 teaspoon paprika
- ½ teaspoon garlic powder
- ½ teaspoon salt
- ¼ teaspoon black pepper
- 1 tablespoon lemon juice
- Fresh parsley for garnish
For the Quinoa Base:
- 1 cup quinoa, rinsed
- 2 cups water or vegetable broth
- Pinch of salt
For the Lemon-Herb Dressing:
- ¼ cup olive oil
- 2 tablespoons lemon juice
- 1 tablespoon Dijon mustard
- 1 clove garlic, minced
- 1 tablespoon fresh parsley, chopped
- 1 tablespoon fresh dill, chopped (optional)
- Salt and pepper to taste
Method
- Cook the quinoa: In a medium saucepan, combine rinsed quinoa, water or broth, and a pinch of salt. Bring to a boil, then reduce the heat to low, cover, and simmer for 15 minutes until the liquid is absorbed. Remove from heat, fluff with a fork, and let it sit covered for 5 minutes. Set aside.
- Roast the vegetables: Preheat oven to 425°F (220°C). On a large baking sheet, toss zucchini, bell pepper, broccoli, and red onion with olive oil, oregano, salt, and pepper. Spread in a single layer and roast for 20-25 minutes, stirring halfway through, until vegetables are tender and lightly charred at the edges.
- Prepare the dressing: While the vegetables roast, whisk together olive oil, lemon juice, Dijon mustard, minced garlic, parsley, dill (if using), salt, and pepper in a small bowl. Set aside.
- Cook the tilapia: Pat tilapia fillets dry with paper towels. Season both sides with paprika, garlic powder, salt, and pepper. Heat olive oil in a large non-stick skillet over medium-high heat. Add fillets and cook for 3-4 minutes per side, until golden brown and fish flakes easily with a fork. Sprinkle with lemon juice and fresh parsley during the last minute of cooking.
- Assemble the bowls: Divide quinoa among 4 bowls. Top with roasted vegetables and a tilapia fillet. Drizzle generously with lemon-herb dressing. Garnish with additional fresh herbs if desired.
- Serve immediately or store for later (see pro tip).
Pro tip: This recipe is perfect for meal prep in two ways. Option 1: Prepare all components separately and store in airtight containers in the fridge. Assemble bowls fresh each day. Option 2: Assemble complete bowls (without dressing) and store for up to 4 days. Add dressing just before serving to keep everything fresh. The tilapia can also be served cold over a green salad for a refreshing twist on hot days.
Variation: Swap tilapia for salmon (even richer in omega-3s), shrimp, or grilled chicken. For a plant-based version, substitute with marinated tofu or tempeh. You can also vary the vegetables based on what’s in season—asparagus in spring, butternut squash in fall, or cherry tomatoes in summer.
Nutrition (per serving, 1 bowl)
- Calories: 350
- Protein: 33g
- Net Carbs: 44g (including 5g fibre from vegetables)
- Fibre: 5g
- Fat: 18g
Récapitulatif COMPLET des 5 recettes
| # | Recette | Type | Protéines | Glucides nets | Fibres | Temps |
|---|---|---|---|---|---|---|
| 1 | Veggie Protein Loaf | Plat chaud | 20,8g | 8,65g | 4,8g | 45 min |
| 2 | Lettuce Wraps | Wrap frais | 25g | 10g | 3g | 20 min |
| 3 | Sweet Potato Lentil Stew | Soupe | 15g | 23,3g | 8g | 40 min |
| 4 | Garlic Butter Chicken Meatballs | Plat chaud | 27g | 7g | 3g | 30 min |
| 5 | Tilapia Grain Bowl | Bowl | 33g | 44 g (dont 5 g fibres) | 5g | 44 g (dont 5g fibres) |
H2: Frequently Asked Questions About Diabetic Lunches
H3: 1. Can these lunches really keep me full until dinner?
Absolutely! The key is the combination of protein, fibre, and healthy fats in each recipe. With 20-33g of protein per serving and plenty of fibre from vegetables and legumes, these meals are designed to stabilise your blood sugar and keep hunger at bay for 4-5 hours. Many readers have shared that switching to these lunches eliminated their dreaded 3 p.m. cravings.
H3: 2. Are these recipes suitable for type 2 diabetes?
Yes, they are specifically created with type 2 diabetes in mind. Each recipe focuses on low-glycemic ingredients, controlled carbohydrate portions, and balanced nutrition. However, everyone’s body responds differently, so we always recommend checking your blood sugar after trying a new meal and consulting with your healthcare provider.
H3: 3. Can I freeze these lunches for later?
Most of them freeze beautifully! The Sweet Potato Lentil Stew and Veggie Protein Loaf are excellent candidates for freezing. The Chicken Meatballs (without the cauliflower mash) also freeze well. For the Lettuce Wraps and Tilapia Grain Bowl, we recommend prepping components separately and assembling fresh. For more tips, check out our guide to meal prep for diabetics.
H3: 4. What can I serve with these lunches to round them out?
Most of these recipes are complete meals on their own. If you want extra volume, add a simple side salad with lemon vinaigrette, a few extra roasted vegetables, or a small piece of low-glycemic fruit like berries or an apple. Avoid adding bread, crackers, or starchy sides that could spike your blood sugar.
H3: 5. Are these recipes family-friendly?
Absolutely! My own family has tested them all. The Chicken Meatballs and Lettuce Wraps are particular hits with kids because they’re interactive and delicious. You can serve the grain bowl “deconstructed” so everyone can build their own. For more family-friendly diabetic recipes, stay tuned to the blog!
H3: 6. How do I adjust portions for weight loss?
All recipes are portioned for a satisfying meal. If you’re actively trying to lose weight, focus on:
- Filling half your plate with non-starchy vegetables
- Keeping protein portions about the size of your palm
- Being mindful of higher-carb ingredients like quinoa (stick to ½ cup cooked)
The Lettuce Wraps and Veggie Protein Loaf are particularly great for weight loss goals.
H3: 7. Can I make these recipes dairy-free?
Yes! For the Chicken Meatballs, simply omit the Parmesan cheese and use vegan butter in the sauce. The Sweet Potato Lentil Stew and Tilapia Grain Bowl are naturally dairy-free. The Lettuce Wraps use a yoghurt-based sauce that can be swapped for a dairy-free alternative or simply omitted. For more dairy-free diabetic recipes, explore our collection.
H3: 8. I’m new to diabetic cooking—where should I start?
Start with the Lettuce Wraps! They’re the quickest, most forgiving, and require minimal cooking skills. Once you’ve built confidence there, try the Chicken Meatballs—they feel like comfort food but are surprisingly simple. And if you’re looking for more guidance, I share tips regularly on Medium, where I post simplified versions of these recipes.
👉 Want more diabetic-friendly inspiration? Follow me on Medium for exclusive tips and simplified recipes!
H2: Final Thoughts – You’ve Got This, My Friend!
We started this journey with a simple phone call from my aunt—frustrated, hungry, and convinced that healthy lunches meant boring salads and endless cravings. Today, I hope you’re closing this article with something different: hope, excitement, and a kitchen full of possibilities.
These 5 recipes are more than just meals. They’re proof that managing diabetes doesn’t mean sacrificing flavour, satisfaction, or joy. It means learning to work with your body, nourishing it with love, and discovering just how delicious healthy eating can be.
What I want you to remember:
- You don’t need to be a professional chef to create meals you love
- Protein and fibre are your best friends for stable blood sugar
- Every small step—one recipe, one lunch, one day—adds up to real change
- You’re not alone on this journey
Now it’s your turn. Which recipe will you try first? Will it be the comforting Chicken Meatballs, the fresh Lettuce Wraps, or the colourful Tilapia Grain Bowl?
👉 Drop a comment below and let me know! I read every single one and personally respond to as many as I can. Your stories, your questions, and your kitchen victories inspire me to keep creating.
👉 Know someone who needs these recipes? Share this article with them. A friend, a family member, or anyone navigating diabetes or simply wanting to eat better. Good food is meant to be shared.
👉 Want to go deeper? I share additional tips, simplified recipes, and behind-the-scenes content on Medium. It’s my little corner of the internet where we can connect beyond the blog.
👉 Join me on Medium for exclusive diabetic-friendly content!
Thank you from the bottom of my heart for being here. Your trust, your time, and your willingness to nourish yourself with love mean more to me than words can express.
✨ Free Ebook: 5 Healthy Snack Recipes ✨
💌 Get more recipes by email! Subscribe to our newsletter for weekly diabetes-friendly recipes and tips. Subscribe →
Now go make something delicious. You’ve got this. And I’m always here if you need me.
For more diabetes-friendly recipes and tips, check out our complete guide: 20 Low Glycemic Index Recipes for Better Blood Sugar Control.

About the Author
This recipe was created and reviewed by Cooking All Recipes, a food-focused platform dedicated to easy, tested, and family-friendly recipes.
Our recipes are inspired by classic American and British cuisine and are carefully written to ensure clarity, taste, and reliability for home cooks.
Each recipe is tested multiple times to ensure consistent results for home bakers.
How did you find this recipe?
There are no reviews yet. Be the first one to write one.